WoW: Attack of the Nokhud in Mythic Plus Dungeon Guide (Dragonflight Season 1)
Unlike many other dungeons in WoW history, Nokhud Attack does not play in a small part of an area, but takes up the entire area. The entire Plains of Ohn’ahra is the setting for this instance. But don’t worry, you don’t have to fight your way back and forth across the entire area. Instead, you pick up your kite. Because in the attack of the Nokhud you can and should fly from one boss to the next with your dragon riding mount. Of course you can also walk from boss to boss on the floor, but then the time limit will certainly not work.
Number of bosses: 4
Time limit: 40 minutesBecause it would be pretty boring to just knock out the four bosses in a row, you still have to make Trash, of course. Certain mob groups are mandatory because you cannot attack the individual bosses as long as these groups are still alive. Others, however, are purely optional. And so you have a lot of choice with which opponents you want to get the necessary percentages. Because just killing the prescribed opponents is far from enough.
Here’s everything you need to know about the Mythic Plus dungeons in WoW: Dragonflight Season 1.
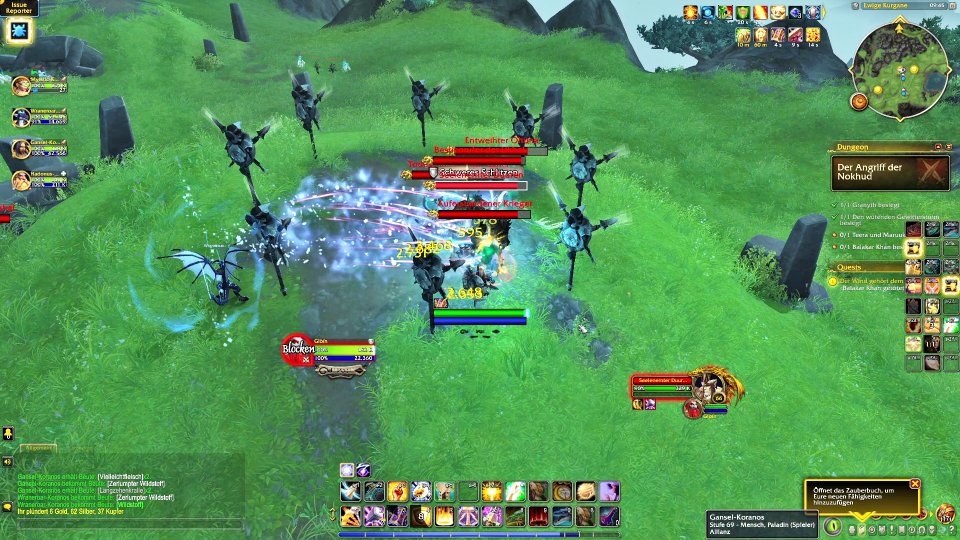
To the east begins… the dungeon!
WoW: Dragonflight: Attack of the Nokhud (1)
Source: buffed
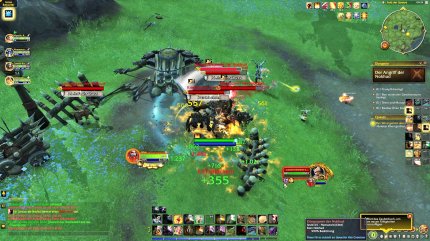
You are free to choose which of the three front bosses you want to do first, but we recommend Granyth as a simple beginner’s boss. In order to start the fight against the stone dragon, you must first unlock the four dragon slayer lances (the ballistae) that are scattered around him. You need this anyway in the following boss fight. You can theoretically ignore the rest of the mobs running around, but we recommend that you clear them away as well. You will need the percentages in the end anyway and so you have significantly more space available.
The trash mobs are very similar and not really dangerous. Step out of the brown whorls on the ground, interrupt the GALLERY as this spell not only deals a lot of damage but also interrupts your own spells and then silences you for 6 seconds.
WoW: Dragonflight: Attack of the Nokhud (2)
Source: buffed
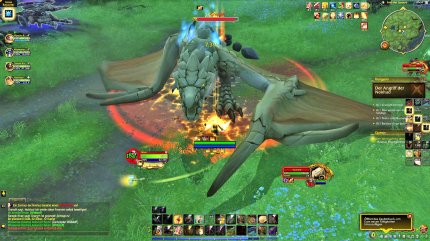
The first boss of the dungeon is pretty easy if you get the one important mechanic right. Periodically, the boss works ERUPTION. He causes high and increasing area damage to all players. After a few seconds this is no longer survivable. However, there is a way to interrupt this deadly spell. For this you have to activate one of the ballistae at the edge of the arena, which then fires at the boss and cancels the spell. If you can do that, the rest is child’s play. If you don’t get it right, the first boss will be the end of the dungeon.
Luckily, there’s little else to watch out for. There is an area damage called STONE SPLITTERwhich you can hardly escape, as well as that TECTONIC PUMPS, in which all players have to get away from the boss for a moment. However, you must regularly kill the appearing adds. These run purposefully to a ballista and try to destroy it. Of course you have to prevent that.
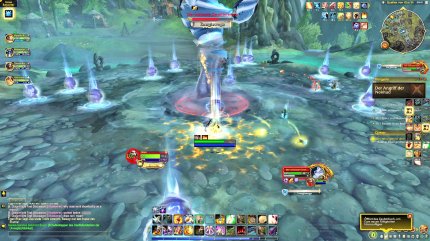
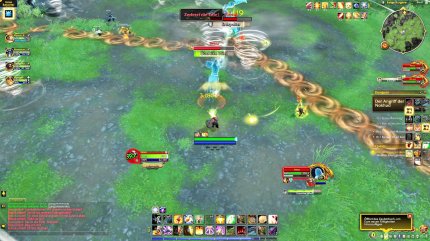
First the totems
Afterwards you swing on your kite and fly to the south. In order to activate the Raging Thunderstorm, you must defeat the four mini-bosses that are shown to you on the map. You should always destroy the Storm Surge Totem first. Many opponents work namely TOTEM OVERLOAD, which buffs the totem and deals extremely high area damage. Unfortunately, the spell cannot be interrupted either. Otherwise, stop as many spells as you can and skillfully dodge all the blue swirls on the ground.
WoW: Dragonflight: Attack of the Nokhud (3)
Source: buffed
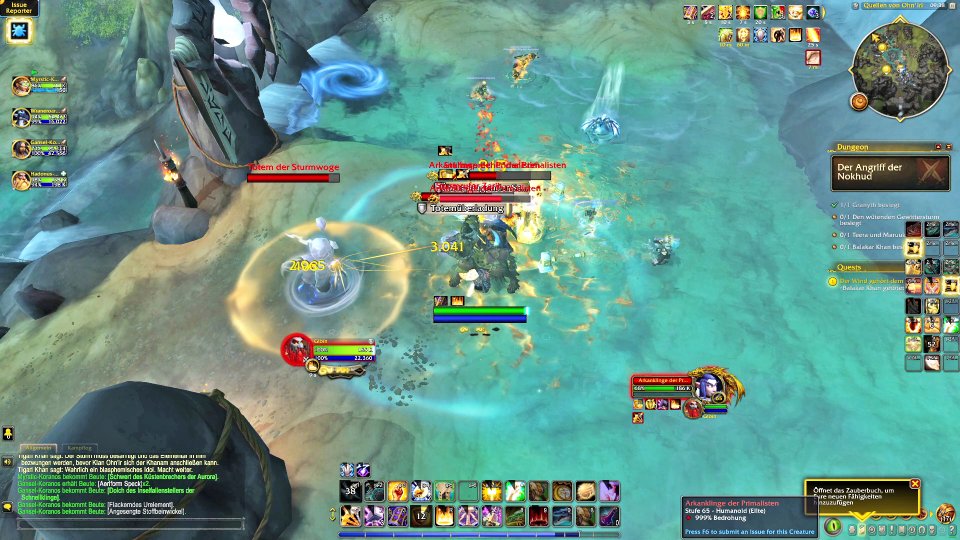
Raging Thunderstorm: Immobile Elemental
Raging Thunderstorm stays in place and cannot be moved. If the tank is not in melee range, then he will gust of wind attacks, dealing a similar amount of damage – but as Nature damage. From time to time the boss buffs himself ENERGY SURGE, causing it to deal increased damage. But this can be cleaned by various classes.
WoW: Dragonflight: Attack of the Nokhud (4)
Source: buffed
The most important mechanics are the energy balls. These slowly move towards the boss. If you touch one of these orbs, you will receive Nature damage and a buff that increases damage and healing by 5 percent.
This buff stacks and if you let the bullets through, the boss gets the buff. Make sure that no bullet gets through and, above all, your healer gets enough buffs. Because he regularly has to deal with the massive damage from ELECTRIC STORM heal. In addition, the boss occasionally misses large blue circles in which no player should stand and which causes all the balls in them to explode.
Don’t let yourself be controlled
Before the next boss in the south-west of the map you have to defeat all of the marked mini-bosses again. Don’t pull too much here as most opponents have nasty spells in their repertoire. Especially that DOMINATE you have to interrupt, otherwise other players will be taken over. But the rest of the magic has it all. DEATHFLASH SALVAGE deals high splash damage and this time the ground effects you have to step out of are green.
WoW: Dragonflight: Attack of the Nokhud (5)
Source: buffed
Teera and Maruuk: Nasty overlaps
Maruuk and Teera both have basic abilities, but the mix can be dangerous. Teera keeps bouncing and the tank has to drag Maruuk after them as they both deal more damage if they are more than 10 meters apart.
WoW: Dragonflight: Attack of the Nokhud (6)
Source: buffed
Maruuk casts a purple area around him that you have to get out of and shoots big brown swirls that you shouldn’t get caught by either.
Teera fires her arrows at random targets and regularly pushes all players away from her. The subsequent pushing away only ends when you cast your spell GUARDIAN WIND interrupts. As soon as you WIND PUSH ARROW works, you distribute yourselves generously. Because a short time later she fires tornadoes at all players (except the tank). Small hurricanes then come out of the players, which move across the battlefield.
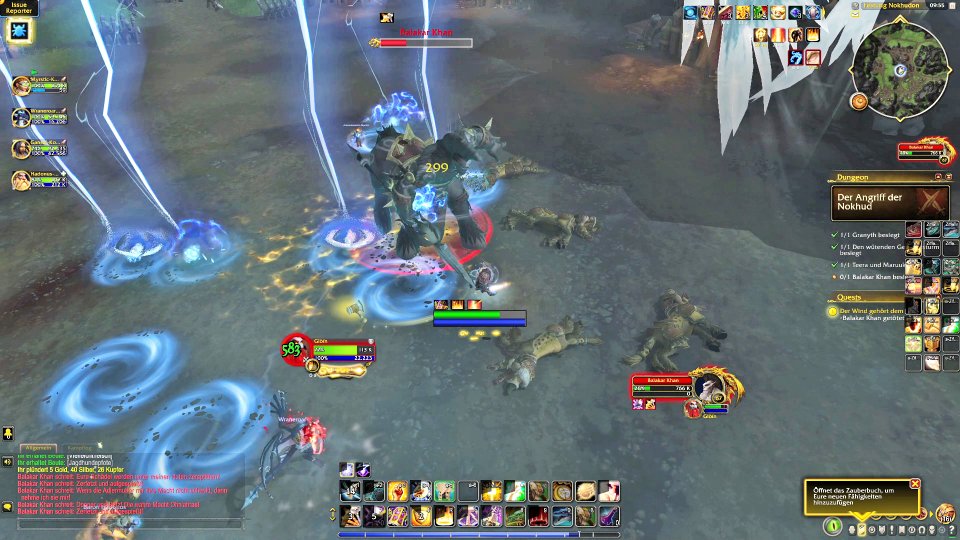
dismount please
You can no longer fly the last few meters to the final boss, you have to cover them on the ground. A few enemies follow, as you already know them from the first boss, before two mini-bosses await at the very end: Batak and Balara. Just dodge the vortices and the approaching frontal attack and don’t all stand in one spot so that the onslaught doesn’t hit everyone. Then you can attack the final boss.
WoW: Dragonflight: Attack of the Nokhud (7)
Source: buffed
Balakar Khan has two phases, the second phase is basically similar to the first, but his abilities have been buffed with a few Blitz abilities. The boss casts a big frontal attack that you can easily run out of. He also throws his spear at random targets and then charges after the spear. You shouldn’t let that get you down either. Is also distributed so that the circles of EARTHQUAKE meet only yourself.
In the intermediate phase, you quickly knock out the four adds. Interrupt as many spells as possible while dodging the blue impacts. After that, phase 1 begins again. The thrown spear now pulls all players towards it and you all have to dodge the ensuing onslaught. The circles of EARTHQUAKE leave a puddle on the ground and you have to dodge additional small blue impacts.
Reference-www.buffed.de